Many years ago when I first began teaching scrapbooking classes with Creative Memories, “strips and triangles” were all the rage! A quick and easy way to complete an album page, just add stickers and you’re done!
Take a look at this layout completed in 2003!

Well, here’s an updated version on how to use your scraps to create ‘strips and triangles’ to complete a scrapbook layout.

For this layout, I’m simply using a 2″ x 6″ strip of paper from each of the 6 double-sided designer papers in the Winterberry Collection from Creative Memories, but you can use any collection to create this look!
Supplies Needed:
- 2″ x 6″ strip from each of 6 patterned papers from a CM Designer Paper Pack (6 in total)
- 2 Cardstock sheets for the background (navy)
- 4″ x 12 ” Strip of Cardstock (white)
- Cardstock for photo mats (white)
- 6″ x 12″ Cardstock (white)
- ABC/123 Stickers
- Stickers
- Tape Runner, Repositionable Adhesive
- Foam Squares
- Border Maker System (Chrystal Chain) or Border Punch
- 12″ Trimmer
- Personal Trimmer
- Scissors
- Multipurpose Tool
Instructions:
- Use two sheets of cardstock for your base (navy).
- Cut each of the 2″ x 6″ strips of Designer Paper in half so you have 12 – 1″ x 6″ strips.
- Adhere each of the 1″ x 6″ strips to the 6″ x 12″ sheet of cardstock side-by-side reversing the patters as you go, so all 12 patterns are showing. (trim to 6″ x 12″)

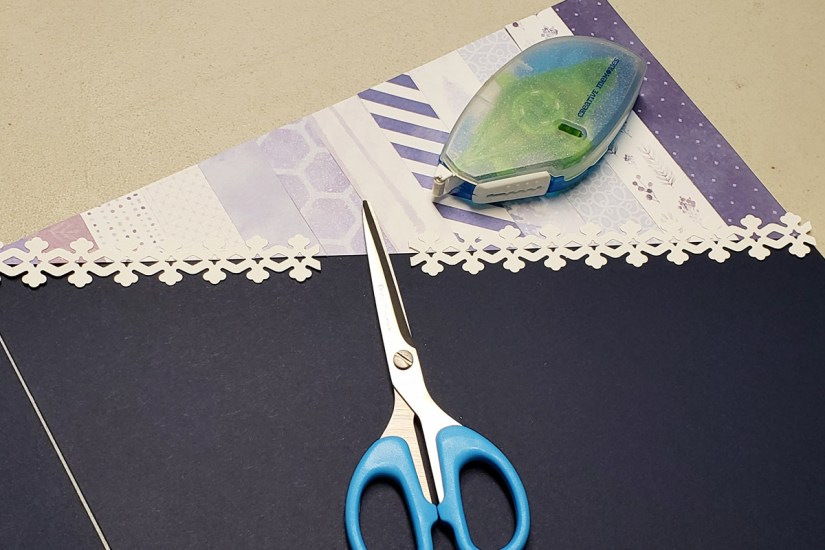
- Cut the cardstock with strips attached in half diagonally.

- Adhere the triangle pieces in opposite corners of the layout.
- Use the Border Maker System (Crystal Chain) or a Border Punch to cut 2 borders from the 4″ x 12″ strip of Cardstock.
- Place the border strips along the edge of the triangle strips (do not adhere).

- Arrange photos on the layout as desired (do not adhere to layout) overlapping one photo over each of the triangles.
- Mat desired photos (do not adhere to layout).
- Find where the photos overlap the triangles and use scissors to cut the border strip into 2 pieces at the center of the overlap area.
- Adhere the border strips using Repositionable Tape Runner starting at the edge of the paper for each, leaving a gap where the overlap is. Trim excess from edges.
- Adhere the photos to the layout.
- Add a title using ABC/123 Stickers (Tip – use the Multipurpose Tool to help with placement).
- Add stickers using Foam Squares if desired.
- Add journaling.
And there you have it, a quick and “Strips & Triangles” layout!
Here’s a one-page layout version featuring the Wicked Cute Collection from Creative Memories.

So, what do you think? Would this be a layout you would create? Would it be a one-page layout or two-page? Can you imagine yourself creating this layout multiple times with various collections? I sure can!
Happy Scrapbooking!
Tammy
Thank you for supporting my affiliate programs:
Creative Memories
FOREVER
Cricut
Shutterfly
Etsy
