Introducing the Global Glow Recipe Template from Creative Memories. This is not ‘quick and easy’ as many of my layouts tend to be, but it’s good to switch things up a bit and add a decorative, or in this case REALLY decorative, layout to your album now and then.
I am not a ‘decorative’ scrapbooker, so even my Recipe Template layouts seem to have a simplicity about them and that’s why I think they work for me and why so many scrapbookers ooooh and aaaaah over them when I share them.
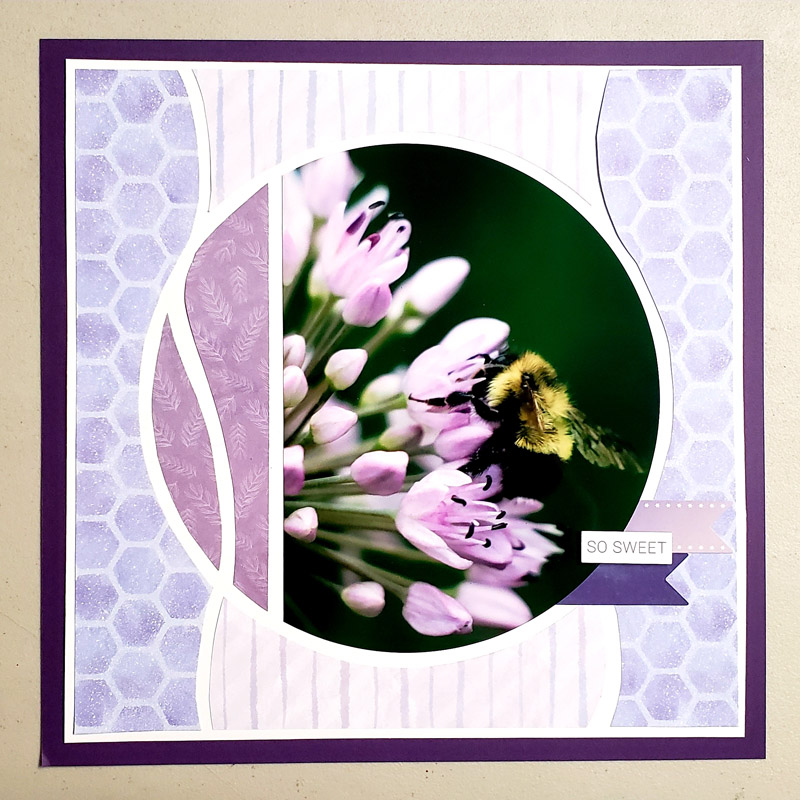
Take a look below at the layout I created using the Global Glow Recipe Template and the Winterberry Collection from Creative Memories. I love how the Winterberry collection is versatile enough to use with summer photos! And the lines in the Recipe Template highlight this photo so well, don’t you think?!
So, how do you use a Recipe Template? Take a look at my step by step process. Once you’ve done a couple, you’ll have a better ‘eye’ for what papers to use and how to put it together to suit your scrapbooking style.
Supplies Needed:
- Creative Memories Recipe Template (Global Glow)
- Various Designer Paper or Cardstock for cutouts
- 12″ x 12″ Designer Paper or Cardstock for the base
- Photos (I used an 8″ x 12″)
- Pencil
- White Eraser
- Multipurpose Clips
- Photo Pencil
- Tape Runner with Repositionable Tape
- Stickers & embellishments
- 12″ or Personal Trimmer
- Scissors
- Custom Cutting System
- Foam Squares
Instructions
- Place the Recipe Template over the base Cardstock
- Place photo(s) under the template to see where you would like to place them
- Place papers under the template to see where you would like to place them
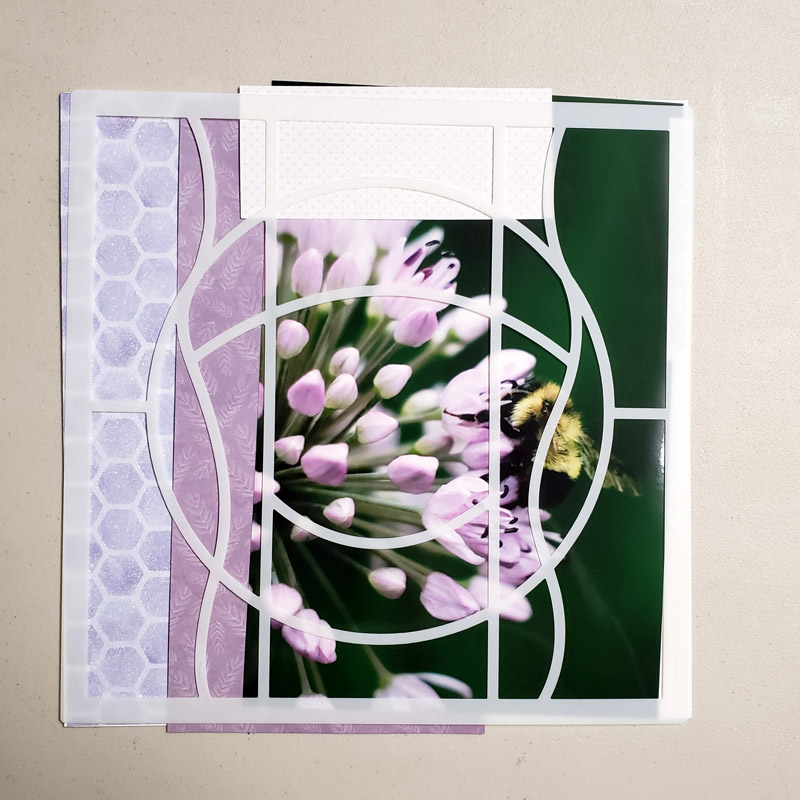
- Use a pencil and lightly start tracing the paper to fit inside the Recipe Template
- Use the Photo Pencil to lightly trace the photo(s) to fit inside the Recipe Template

- Cut using trimmers, scissors or Custom Cutting System if it will fit the template (not all do)
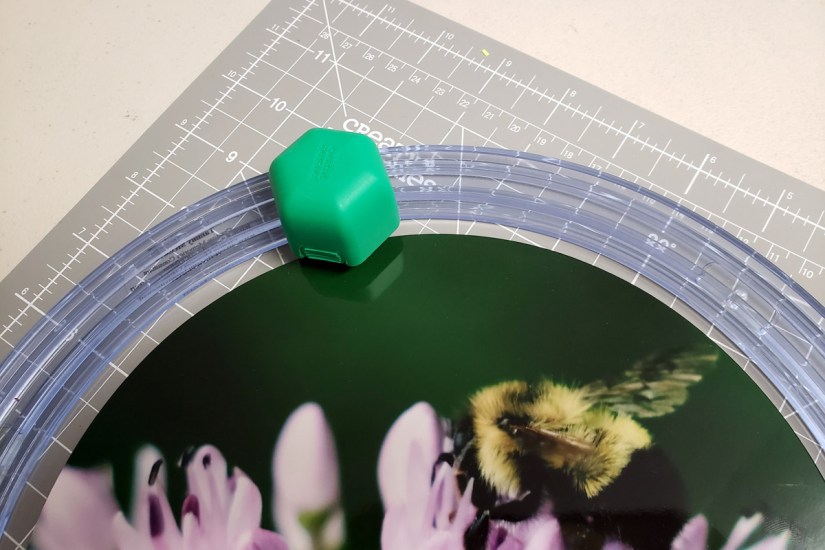
- Place cut pieces inside the Recipe Template
- Adhere using Repositionable Tape Runner (so you can shimmy if needed)

- Use a white eraser to erase lines on paper
- Use a photo polishing cloth to remove lines on photos.

- Add a title, journaling, stickers, and embellishments using Foam Squares as desired.
- For this layout, I ended up trimming 1/4″ off each side of the White Cardstock base so I could mat it on a different coloured cardstock to make it ‘pop’.
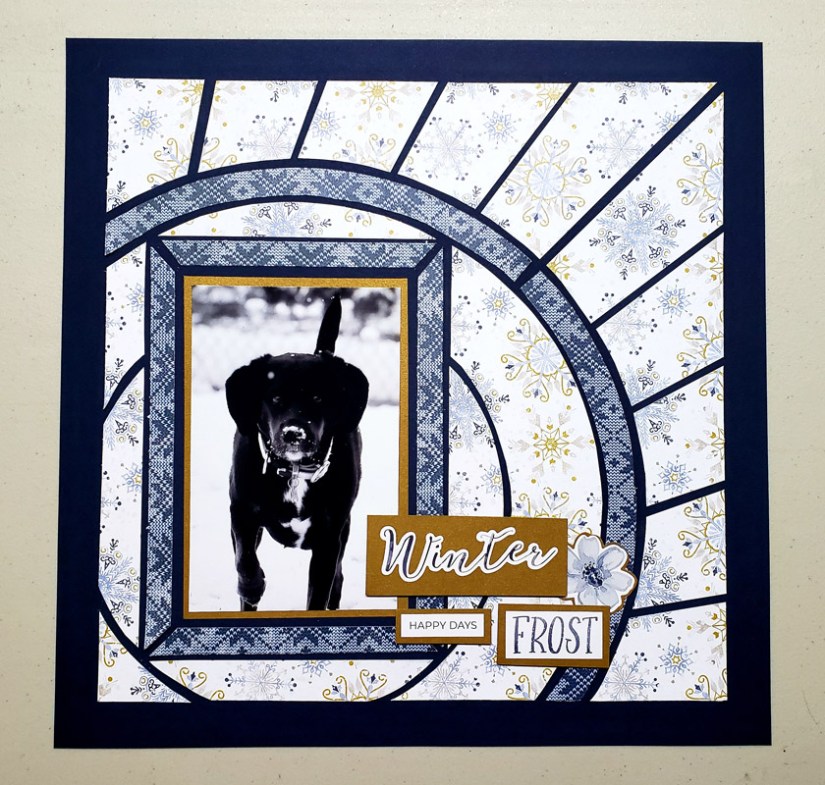
Here’s another layout I created with the Collage Wreath Recipe Template (retired). But you can see, I do try to keep the layout simple, and by doing so, the photos just POP!
So, what do you think? Have you tried a Recipe Template from Creative Memories? If not, do you want to try one now? I think these are a fun way to add decorative pages to your albums.
Happy Scrapbooking!
Tammy
Thank you for supporting my affiliate programs:
Creative Memories
FOREVER
Cricut
Shutterfly
Etsy
